Mashups
Creating Parameter Aliases
If you would like to be able to explore different values for a specific parameter, you will need to create an alias by double-clicking the parameter in the Parameter Aliases section. After naming the alias, you can select the alias in the Mashup tab (center panel), and configure the alias by selecting the Display Widget type and setting Default values.
Notice that a pipeline can have multiple modules of the same type or name, making it difficult to differentiate between them. These modules are each assigned a number, with the numbers in the Annotated Pipeline section corresponding to the numbers in the Parameter Aliases section, making it possible set an alias for the desired module without much confusion. See figure Numbered Modules....
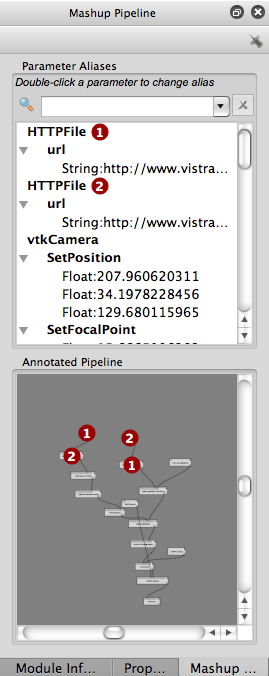
Numbered Modules - The DownloadFile modules 1 and 2 appear in the annotated pipeline and in the parameter aliases. The annotated pipeline also, numbers the vtkDataSetReader modules (which appear below the respective HTTPFile modules in the pipeline). Their parameters have not been exposed to the mashup, so they do not appear in the Parameter Aliases section.
Finally, not all modules in the Annotated Pipeline will show up in the Parameter Aliases section. Only modules whose parameters have been set in the pipeline will appear.
Configuring Parameter Aliases
As mentioned in section Creating Parameter Aliases, aliases are configured in the center panel (the Mashup tab). This is pretty simple, so here are the steps:
- Select the alias you wish to configure from the top box in the
Aliasestab. The name and position of the selected alias should be displayed below. Both of these can be changed by editing theNameand/orOrdervalues. - Next select the type of widget to display. The choices are combobox, slider, and numeric stepper. The combobox will allow you to enter specific values, whereas the numeric stepper and slider will allow you to scroll through a range of values.
- Set the Min Val, Max Val, and Step Size (for slider and numeric stepper only).
- Set the Default Value. The default value should already be set based on the value it was given in the pipeline, but you are allowed to change it here if desired.
- Enter suggested values. If you have a set of values to suggest to the user through the Mashups interface, you should add them to the values list. You can do this by either clicking the
...button and adding the appropriate values, or by entering the values in theValues Listbox in list format. - Finally, you may delete an alias with the
Delete Aliasbutton.
After configuring the necessary aliases, press Preview to interact with your mashup and to ensure its proper functionality.
Saving a Mashup
Mashups are added the the VisTrail when you press the keep button. However, this changes the VisTrail, but does not save it. To fully save your mashup, you should both press the Keep button and save the VisTrail.
Managing Multiple Mashups
The Mashups Inspector allows you to both rename a mashup, and easily switch between existing mashups.
A Simple Example
Try it now!
- Open brain_vistrail.vt
- Choose
Save Asand rename the file if you do not want to overwrite the original. - Select the “contour 3” version
- Press execute to ensure any necessary upgrades are made
- Select
Mashupfrom the toolbar. - In the Mashup Pipeline tab, look under
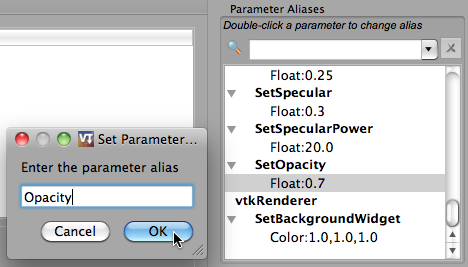
vtkProperty
SetOpacityand double-click onFloat. - Enter “Opacity” in the
Set Parameterbox that pops up, then clickOK. See figure Creating the Opacity Alias. - Under
vtkRenderer SetBackgroundWidget, double-click onColorand enter “Background” as the alias. See figure Creating the Background Alias. - In the center panel, select the
Opacityalias. - Change the display widget to
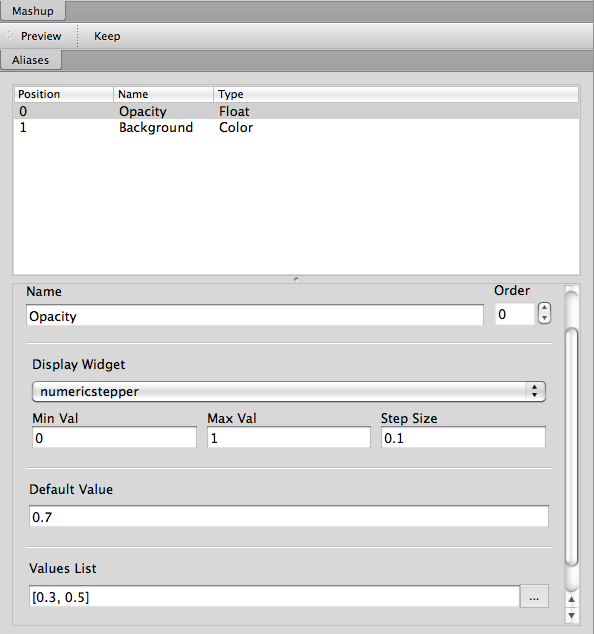
numericstepper. - Set the
Min Val,Max Val, andStep Sizeto 0, 1, and 0.1 respectively. - Set the
Values Listto [0.3, 0.5]. See figure Configuring the Opacity Alias. - Select the
Backgroundalias and make sure the display widget is acombobox. - Select
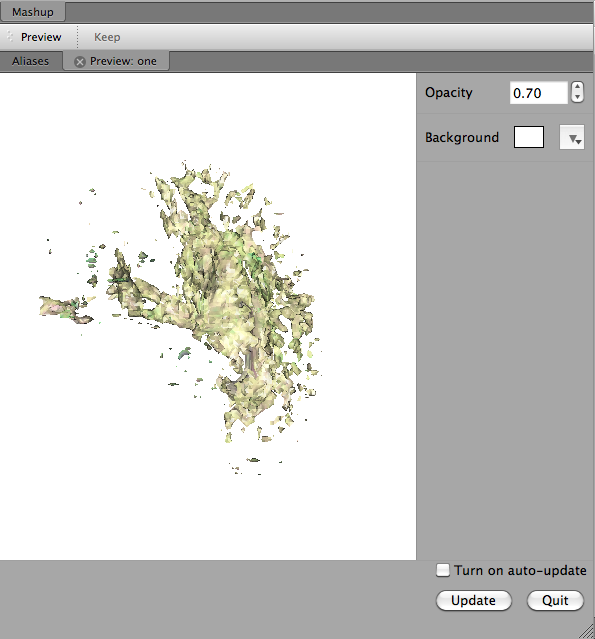
Preview. See figure The resulting mashup. - Select
Tag,No, and then enter “one” as the new tag name. - Save the file. (Open result)
Creating the Opacity Alias.

Creating the Background Alias.
Configuring the Opacity alias.
The resulting mashup.